If you’re planning to travel by train in India, booking your ticket through the IRCTC website is one of the easiest ways. Whether you’re a first-time user or someone who just needs a refresher, this step-by-step guide will help you book your ticket without any confusion.
Step 1: Visit the IRCTC Website
Go to the official IRCTC website: https://www.irctc.co.in
You’ll see the homepage with options like “Book Ticket,” “PNR Status,” “Train Schedule,” etc.
Step 2: Login to Your IRCTC Account
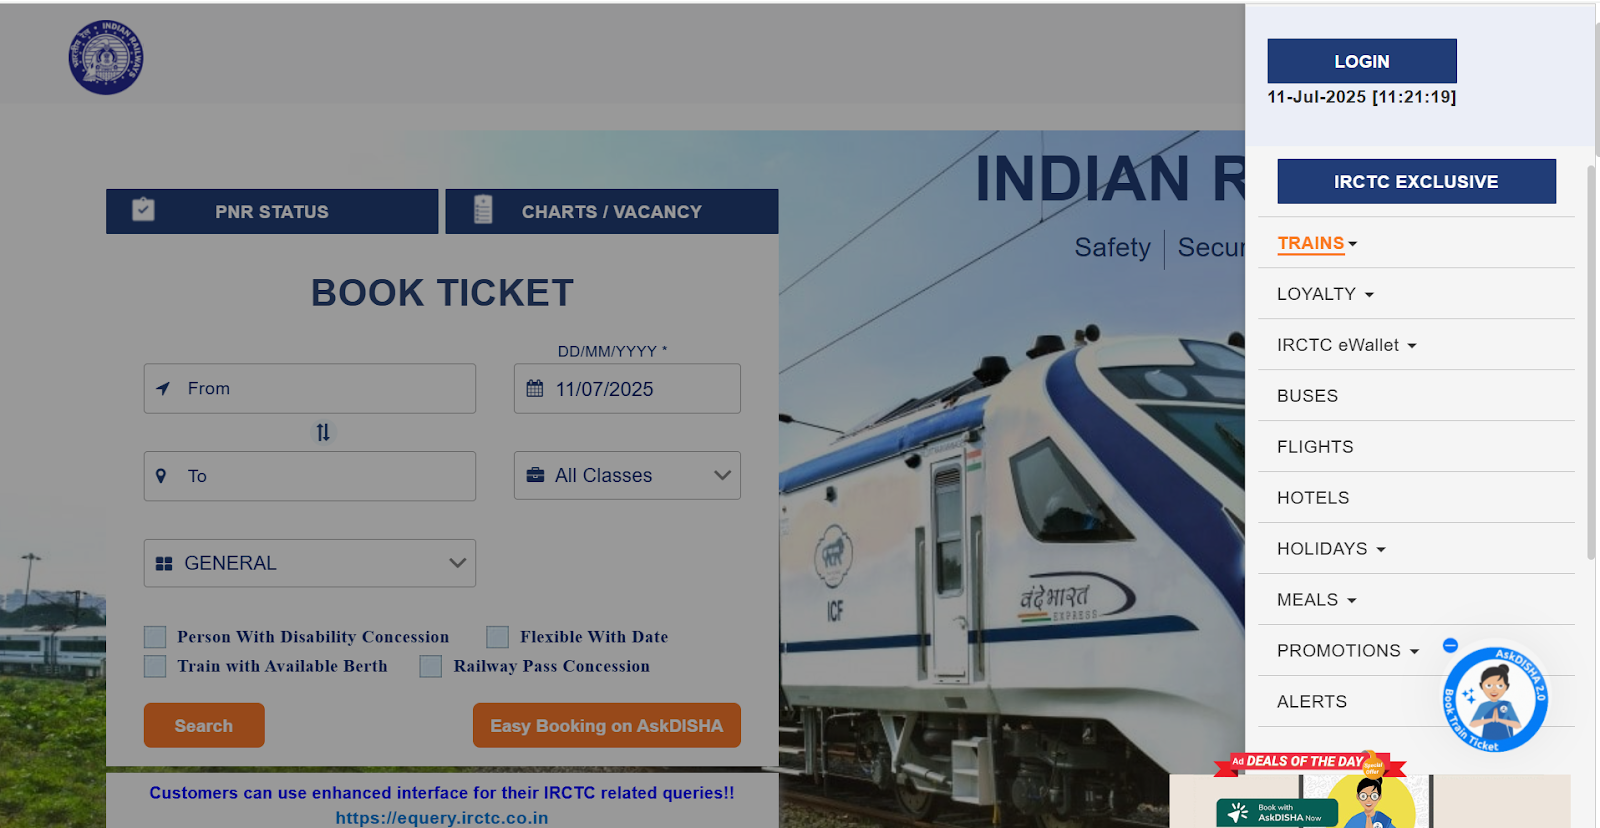
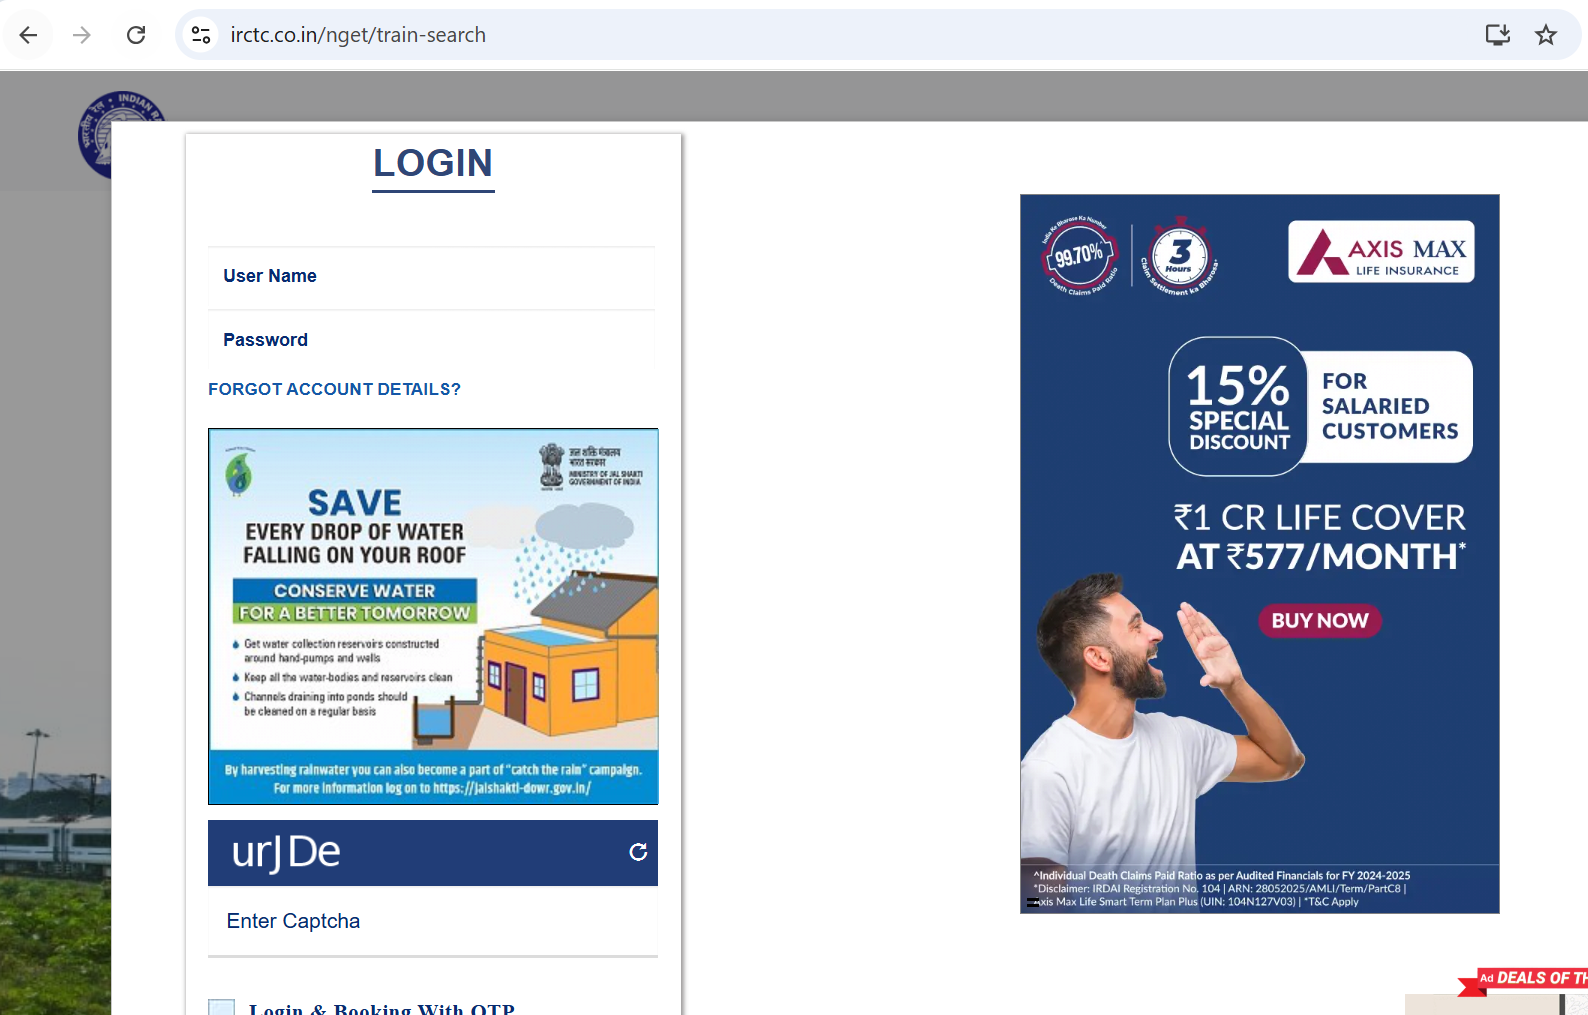
- Click on “Login” at the top right corner.
- Enter your username, password, and captcha code.
- Click “Sign In.”
If you don’t have an account, click on “Register” and fill in your details to create a new account.
Step 3: Enter Your Journey Details
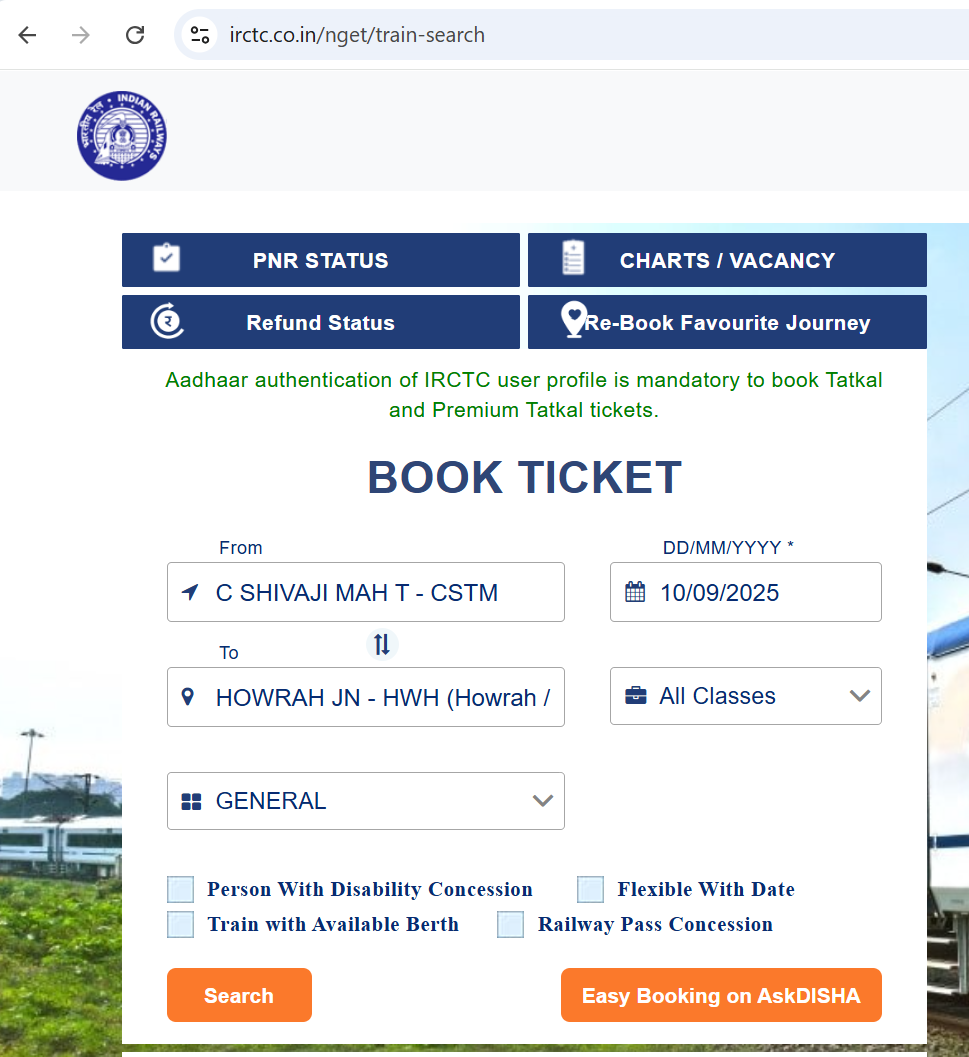
On the homepage, fill in the following:
- From Station: Where you will start your journey.
- To Station: Your destination.
- Journey Date: Select the date you want to travel.
- Class: Choose your preferred class (Sleeper, 3AC, 2AC, etc.).
- Ticket Type: Usually, this is “General.”
Click on “Search” to find available trains.
Step 4: Select a Train
You will see a list of trains running on that route and date.
- Look for a train that suits your time and class preference.
- Check seat availability and fare by clicking the “Check Availability & Fare” button next to the train.
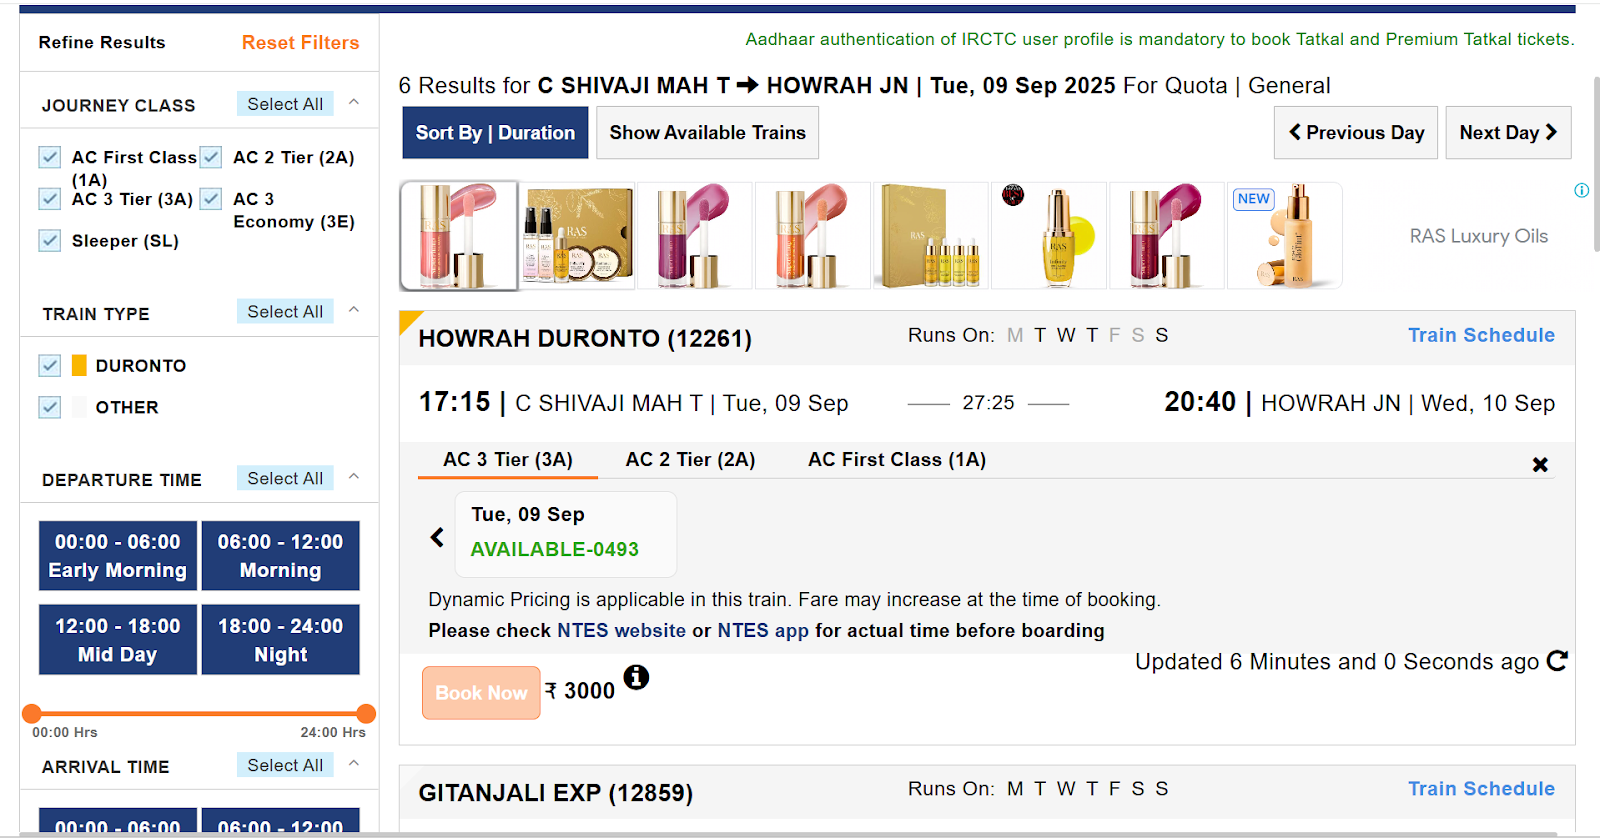
Step 5: Select Your Train and Class
Once you find a train with available seats, click on “Book Now.”
Make sure you’re booking under the correct quota (General, Ladies, Tatkal, etc.)
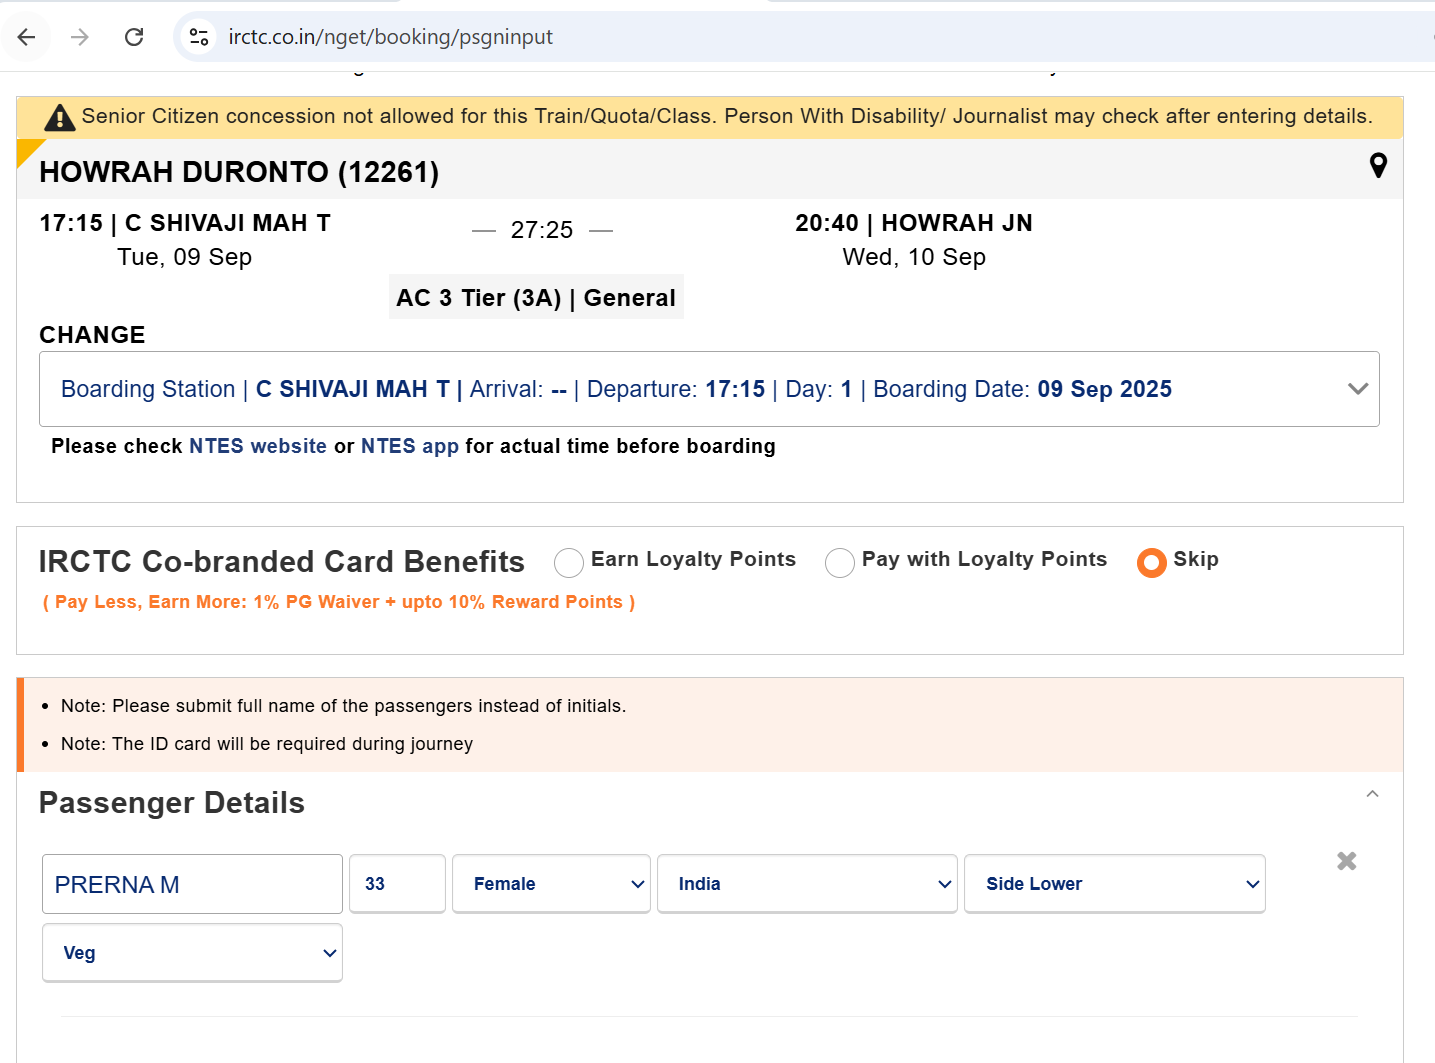
Step 6: Fill in Passenger Details
Enter the passenger information:
- Name
- Age
- Gender
- Berth Preference (optional)
- Senior Citizen checkbox (if applicable)
You can add multiple passengers (up to 6 in one booking).
Tick the box if you want to book food (optional).
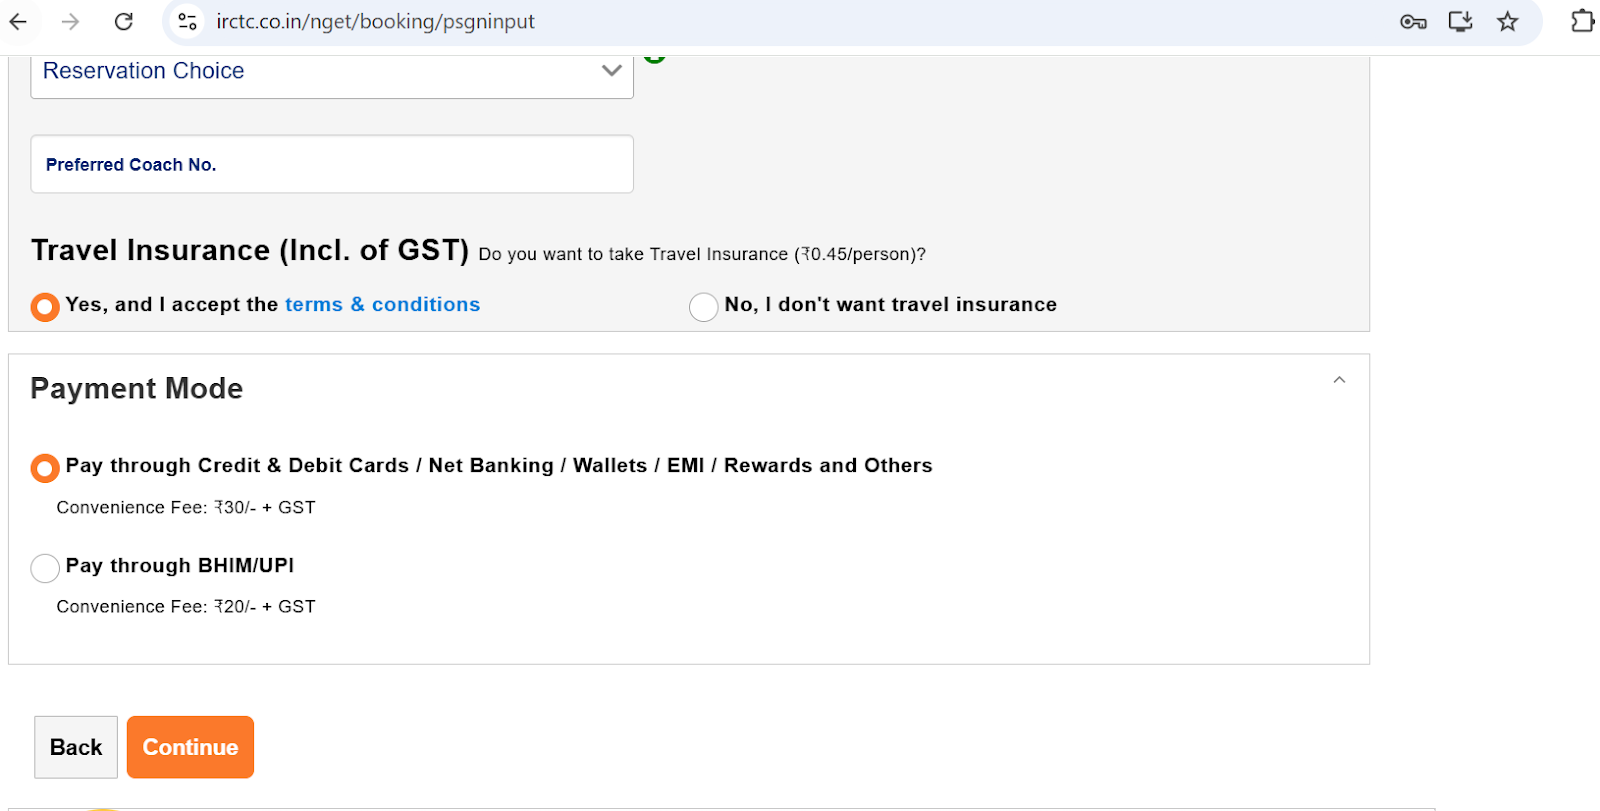
Step 7: Choose Your Travel Preferences
You’ll also see options like:
- Auto-upgrade (for automatic class upgrade if available)
- Travel insurance (usually ₹0.35 – optional)
Select as per your need.
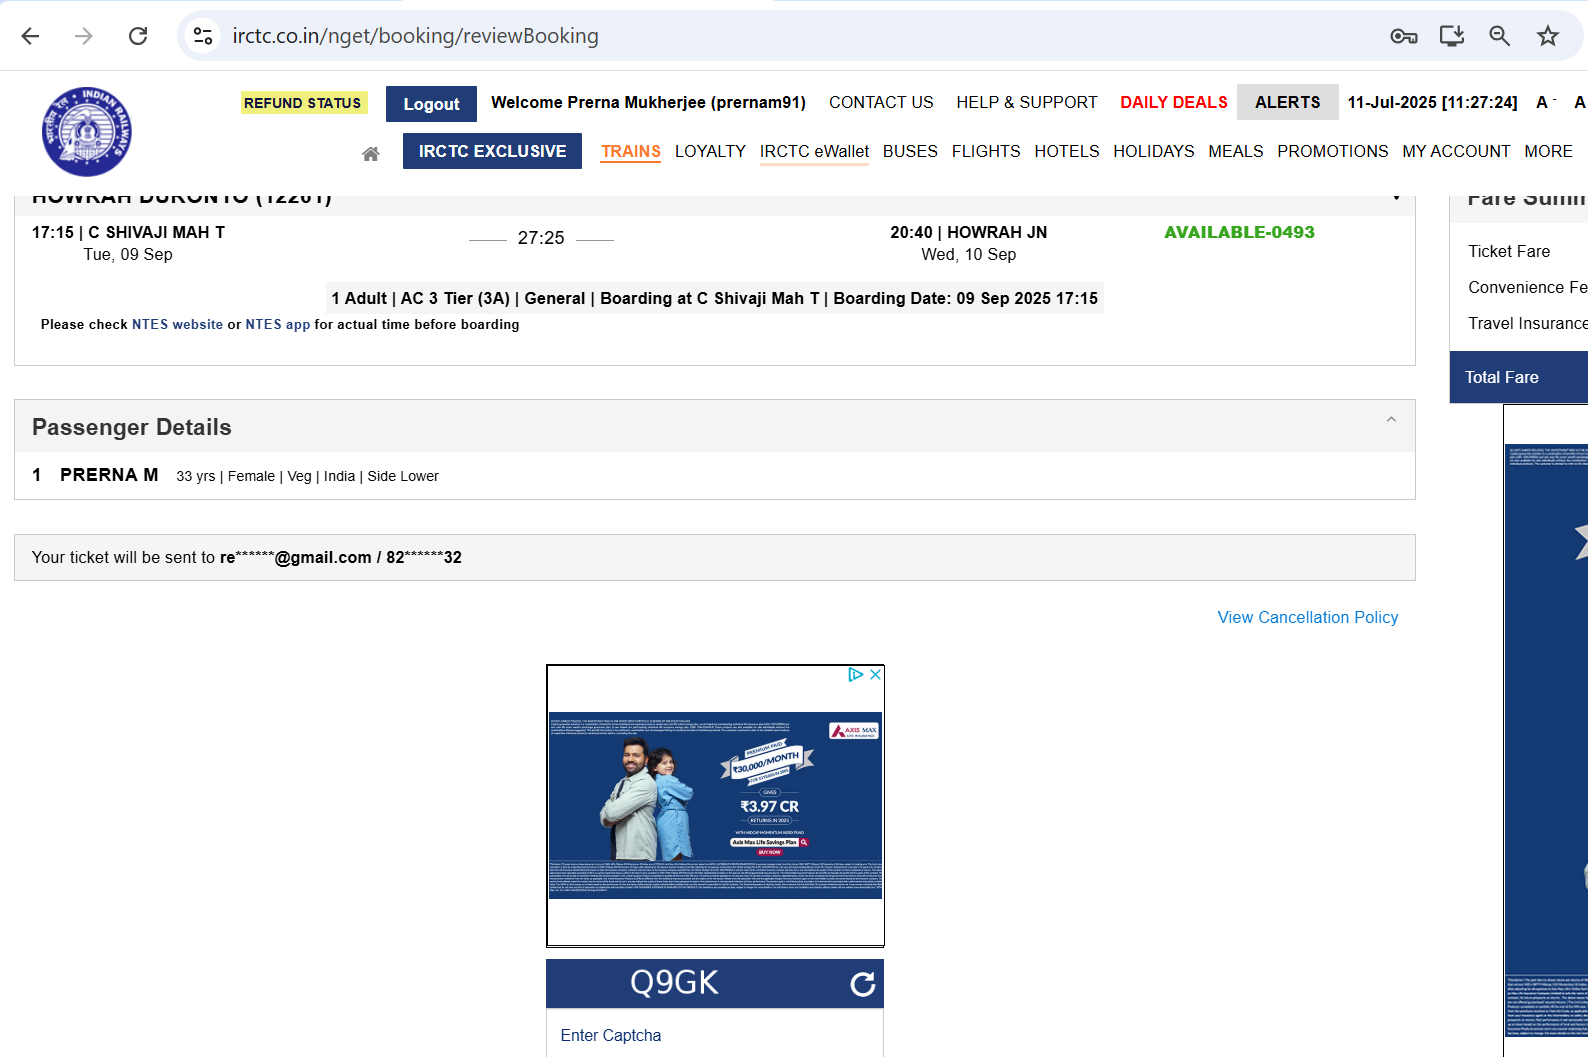
Step 8: Enter Captcha and Click “Continue”
A captcha box will appear at the bottom of the form.
- Enter the characters shown in the image
- Click on “Continue”
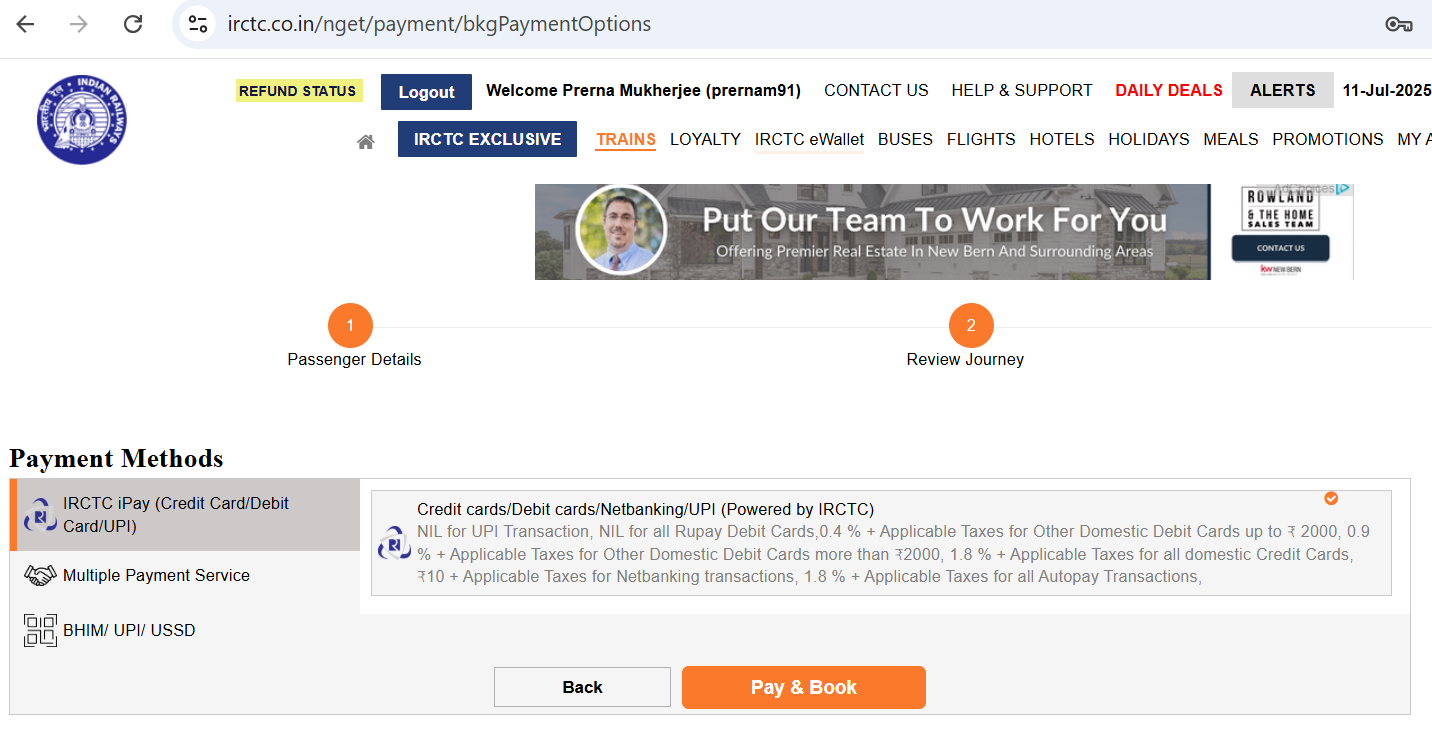
Step 9: Make the Payment
You will be taken to the Payment Page.
Select a payment method:
- Debit/Credit Card
- UPI/Google Pay/PhonePe
- Net Banking
- Wallets like Paytm
Click on your preferred option and complete the payment.
Step 10: Booking Confirmation
Once your payment is successful:
- You will see a confirmation page with your PNR number, train details, and passenger info.
- You will also get an SMS and email with your e-ticket.
Bonus Tip: How to Download or Print Your Ticket
- Go to “My Bookings” or “Booked Ticket History” after logging in.
- Click on “Print E-Ticket” or “Download PDF”
Final Words
And that’s it! You’ve successfully booked your train ticket on IRCTC. Make sure to carry a valid ID during your journey (Aadhaar, PAN, Voter ID, etc.).
If you’re traveling soon, double-check your PNR status closer to the journey date to know your final seat and coach allocation.